MyWages
User Guide · Learn how to get the most out of MyWages
Guide Outline
Home Guide
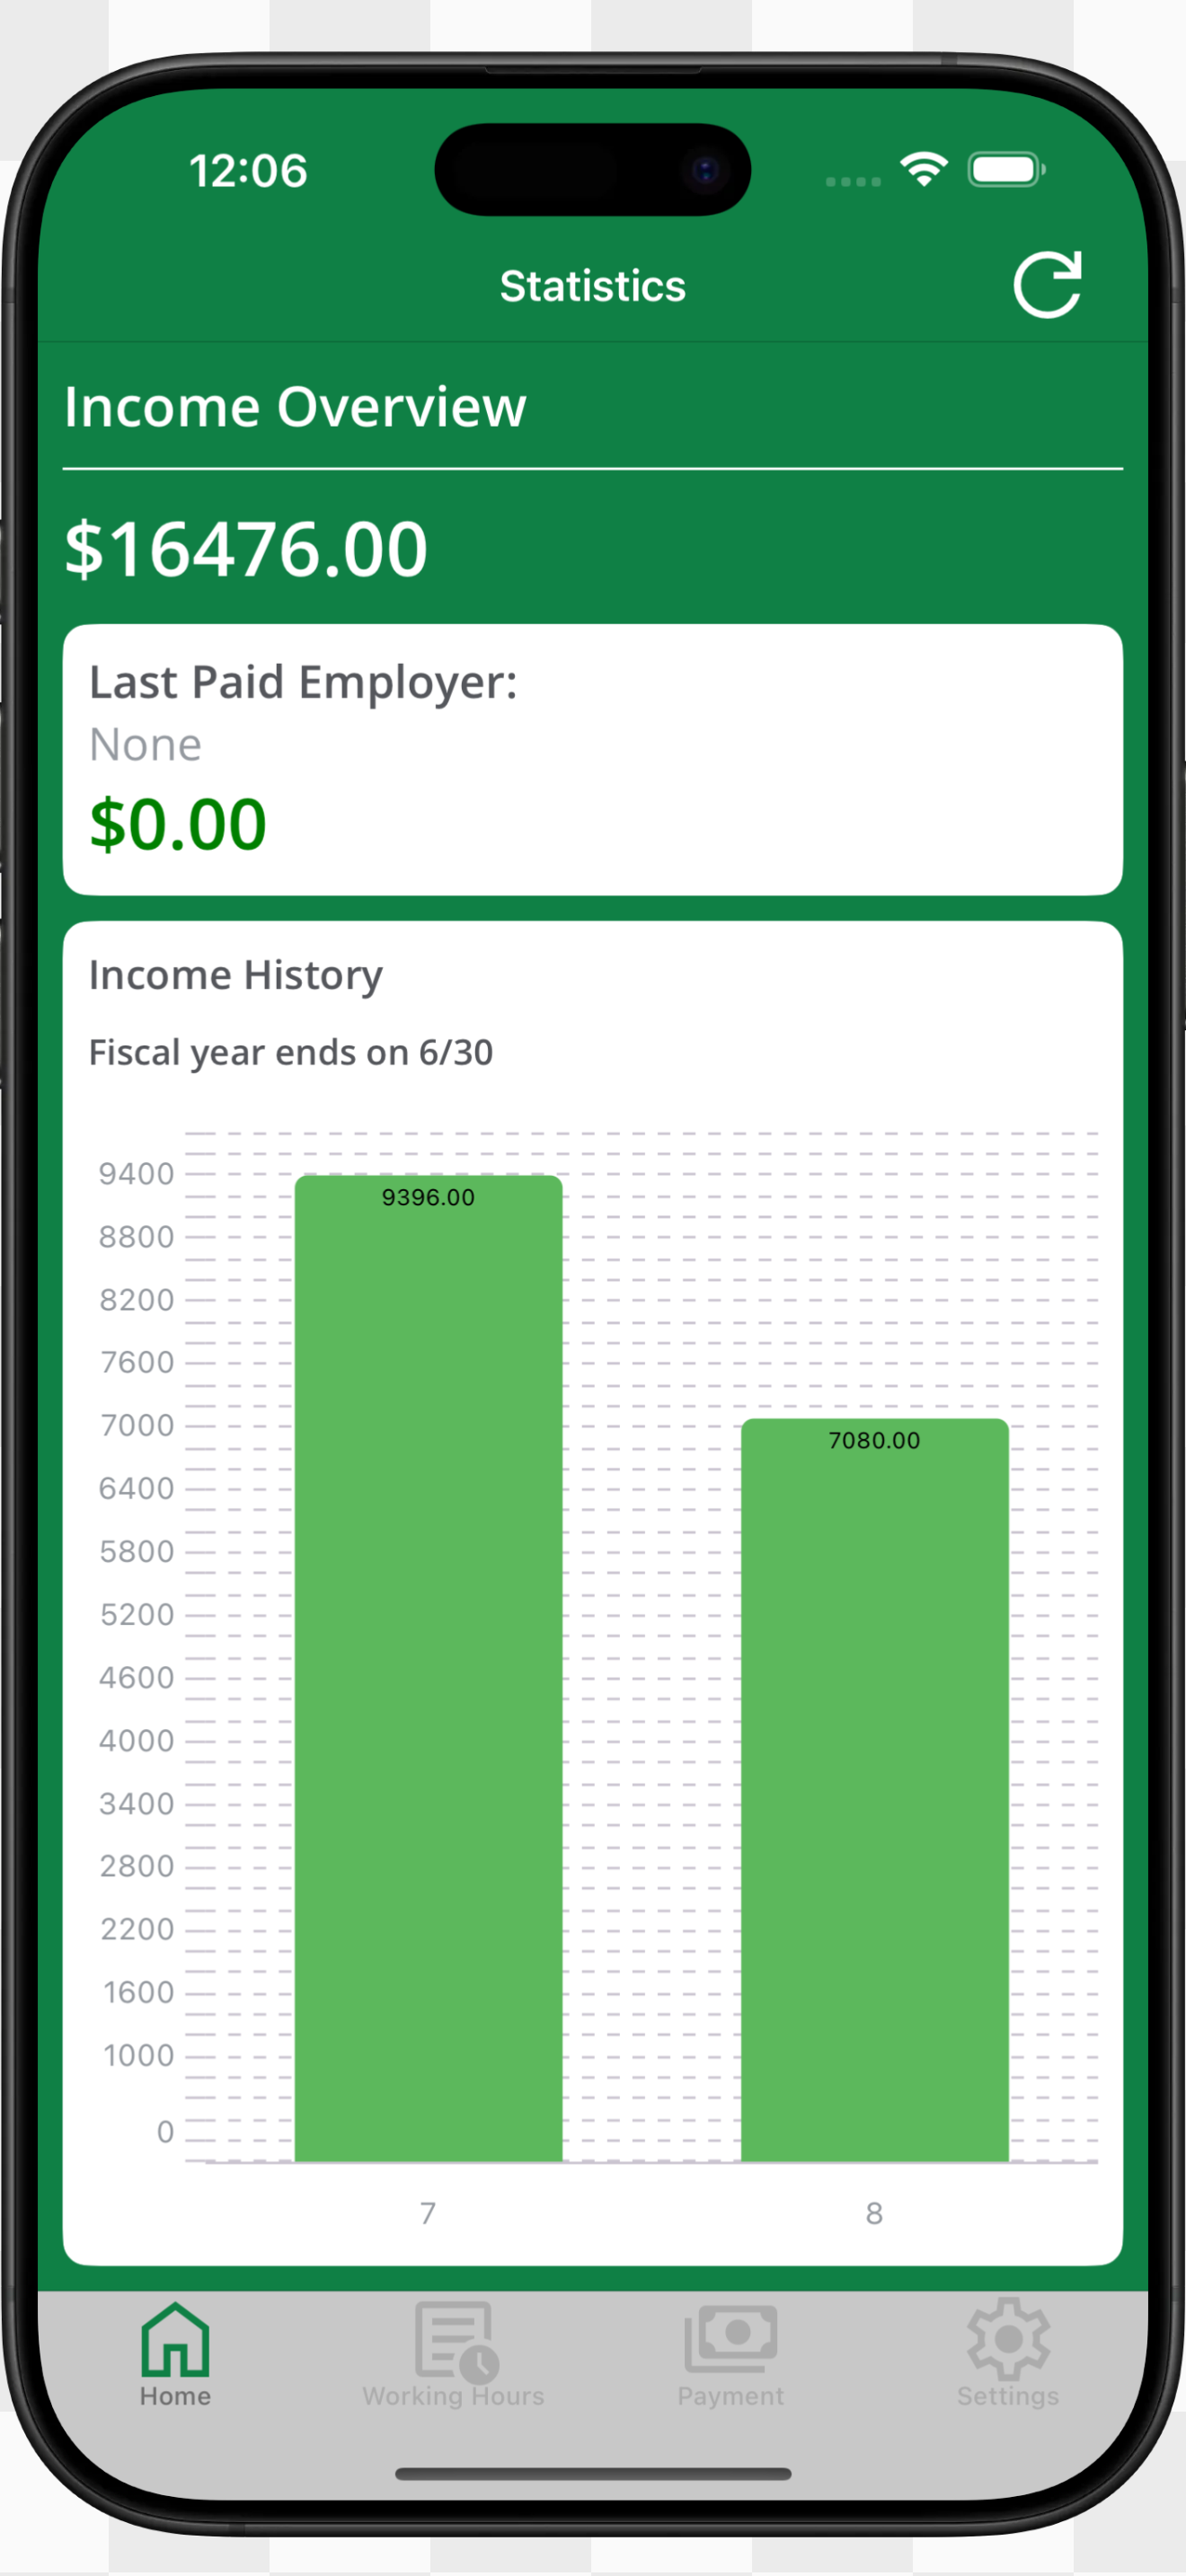
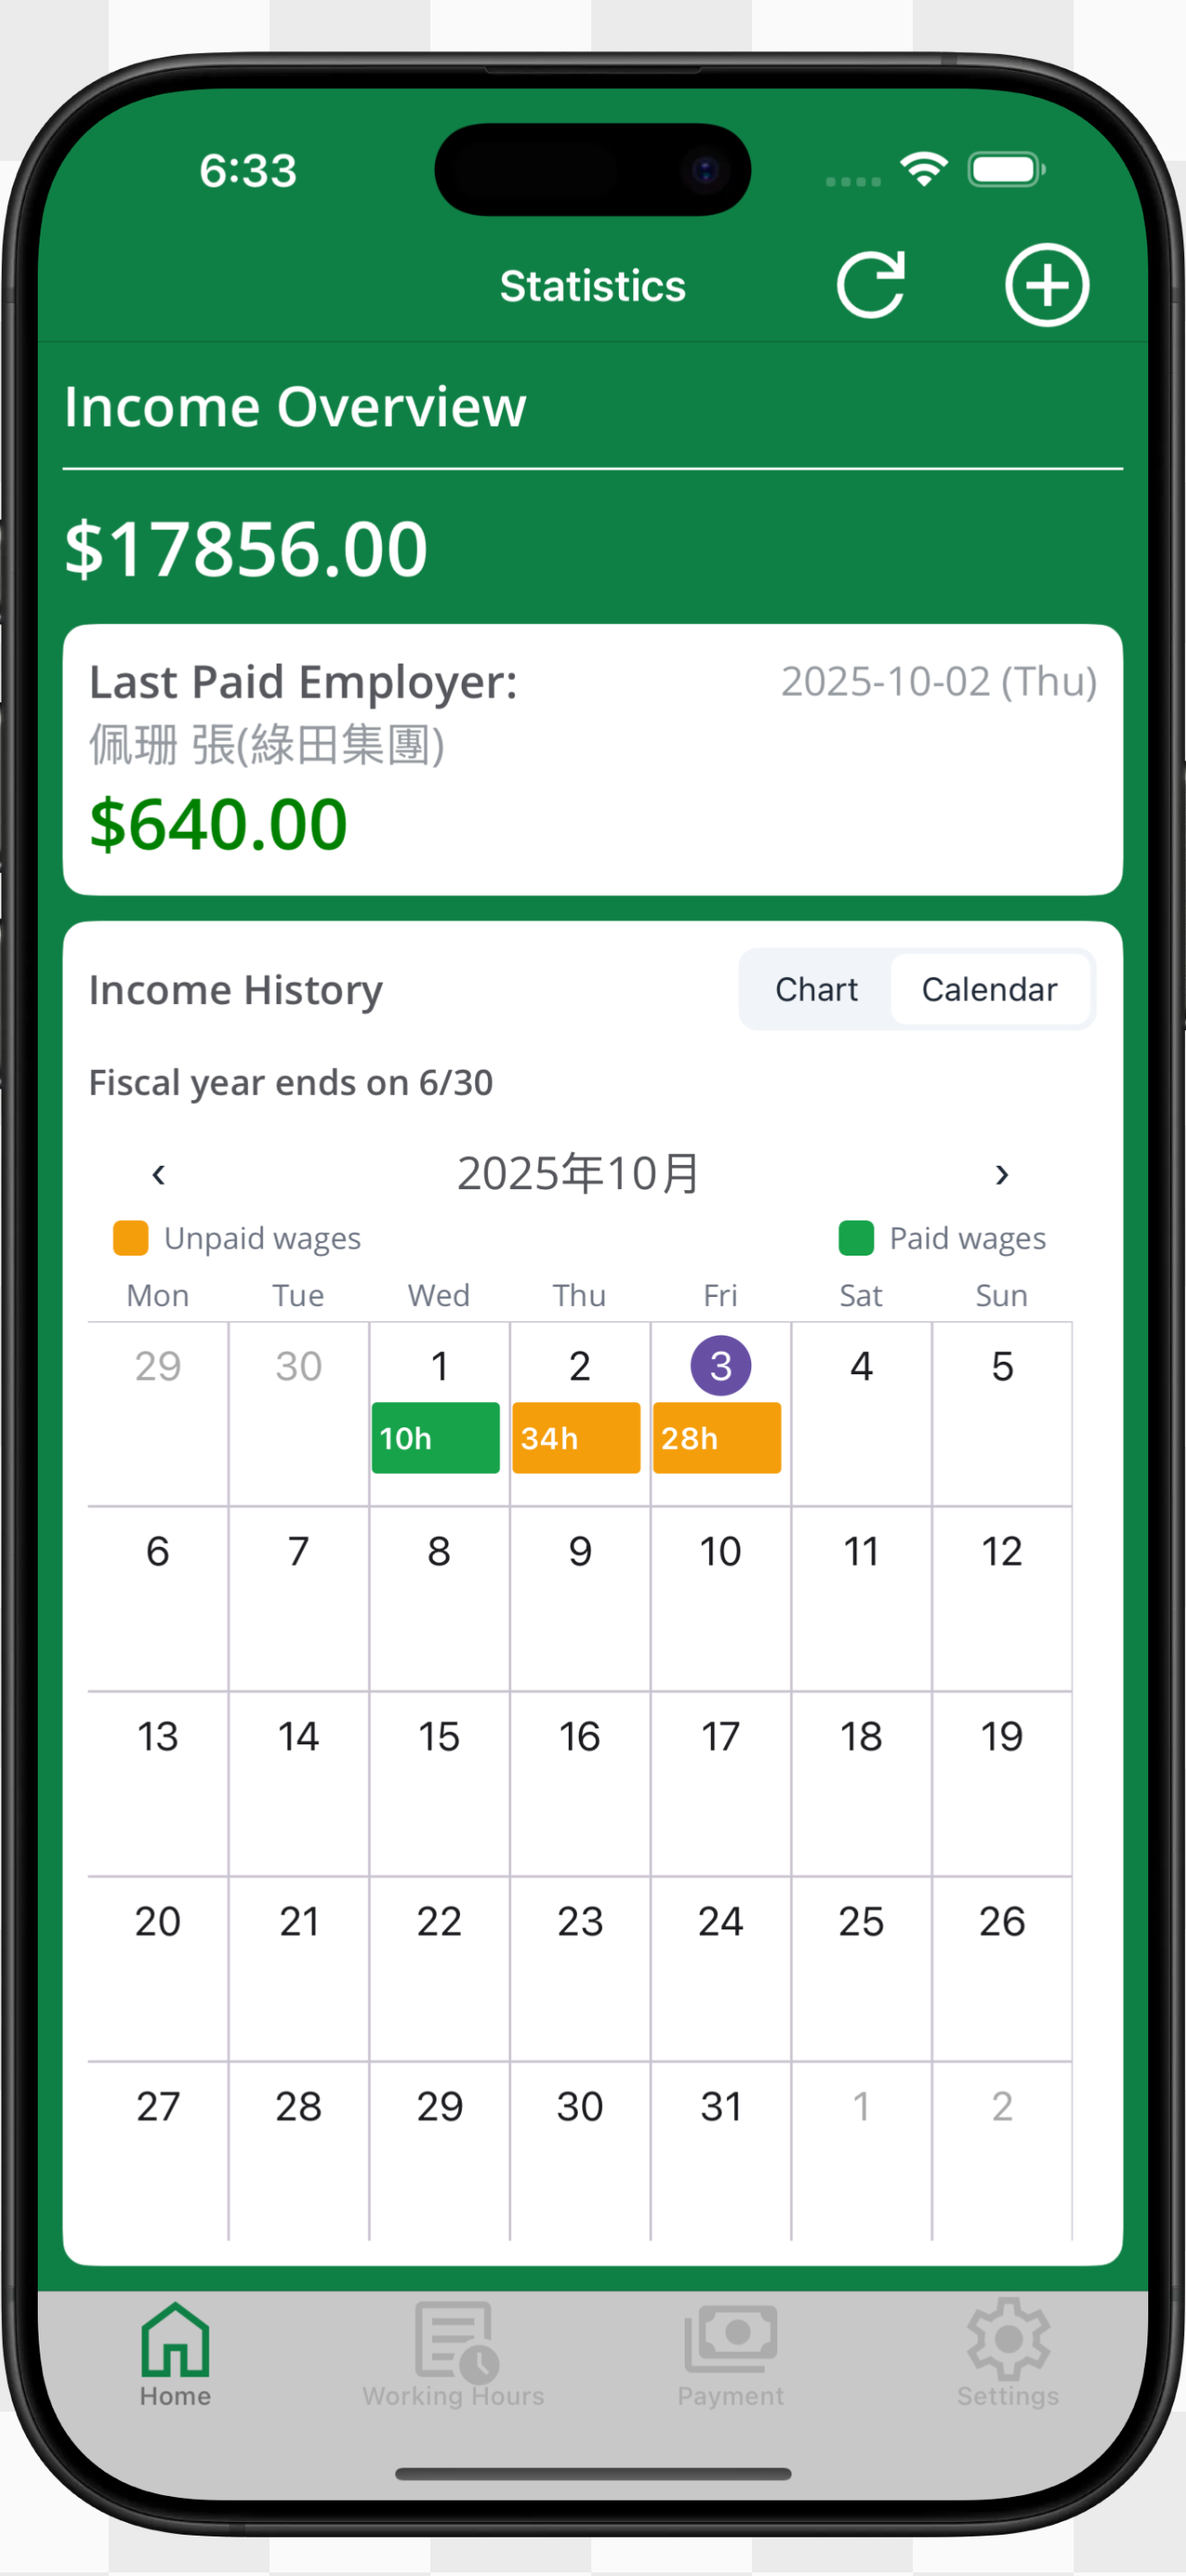
Page Overview
- Top Summary: Review the fiscal year’s cumulative income plus the most recent employer, payment date, and amount.
- Mode Toggle: Switch between Chart and Calendar views to focus on income trends or daily shift distribution.
Top Action Buttons
- Refresh: Tap the refresh icon to update totals, charts, and calendar data instantly.
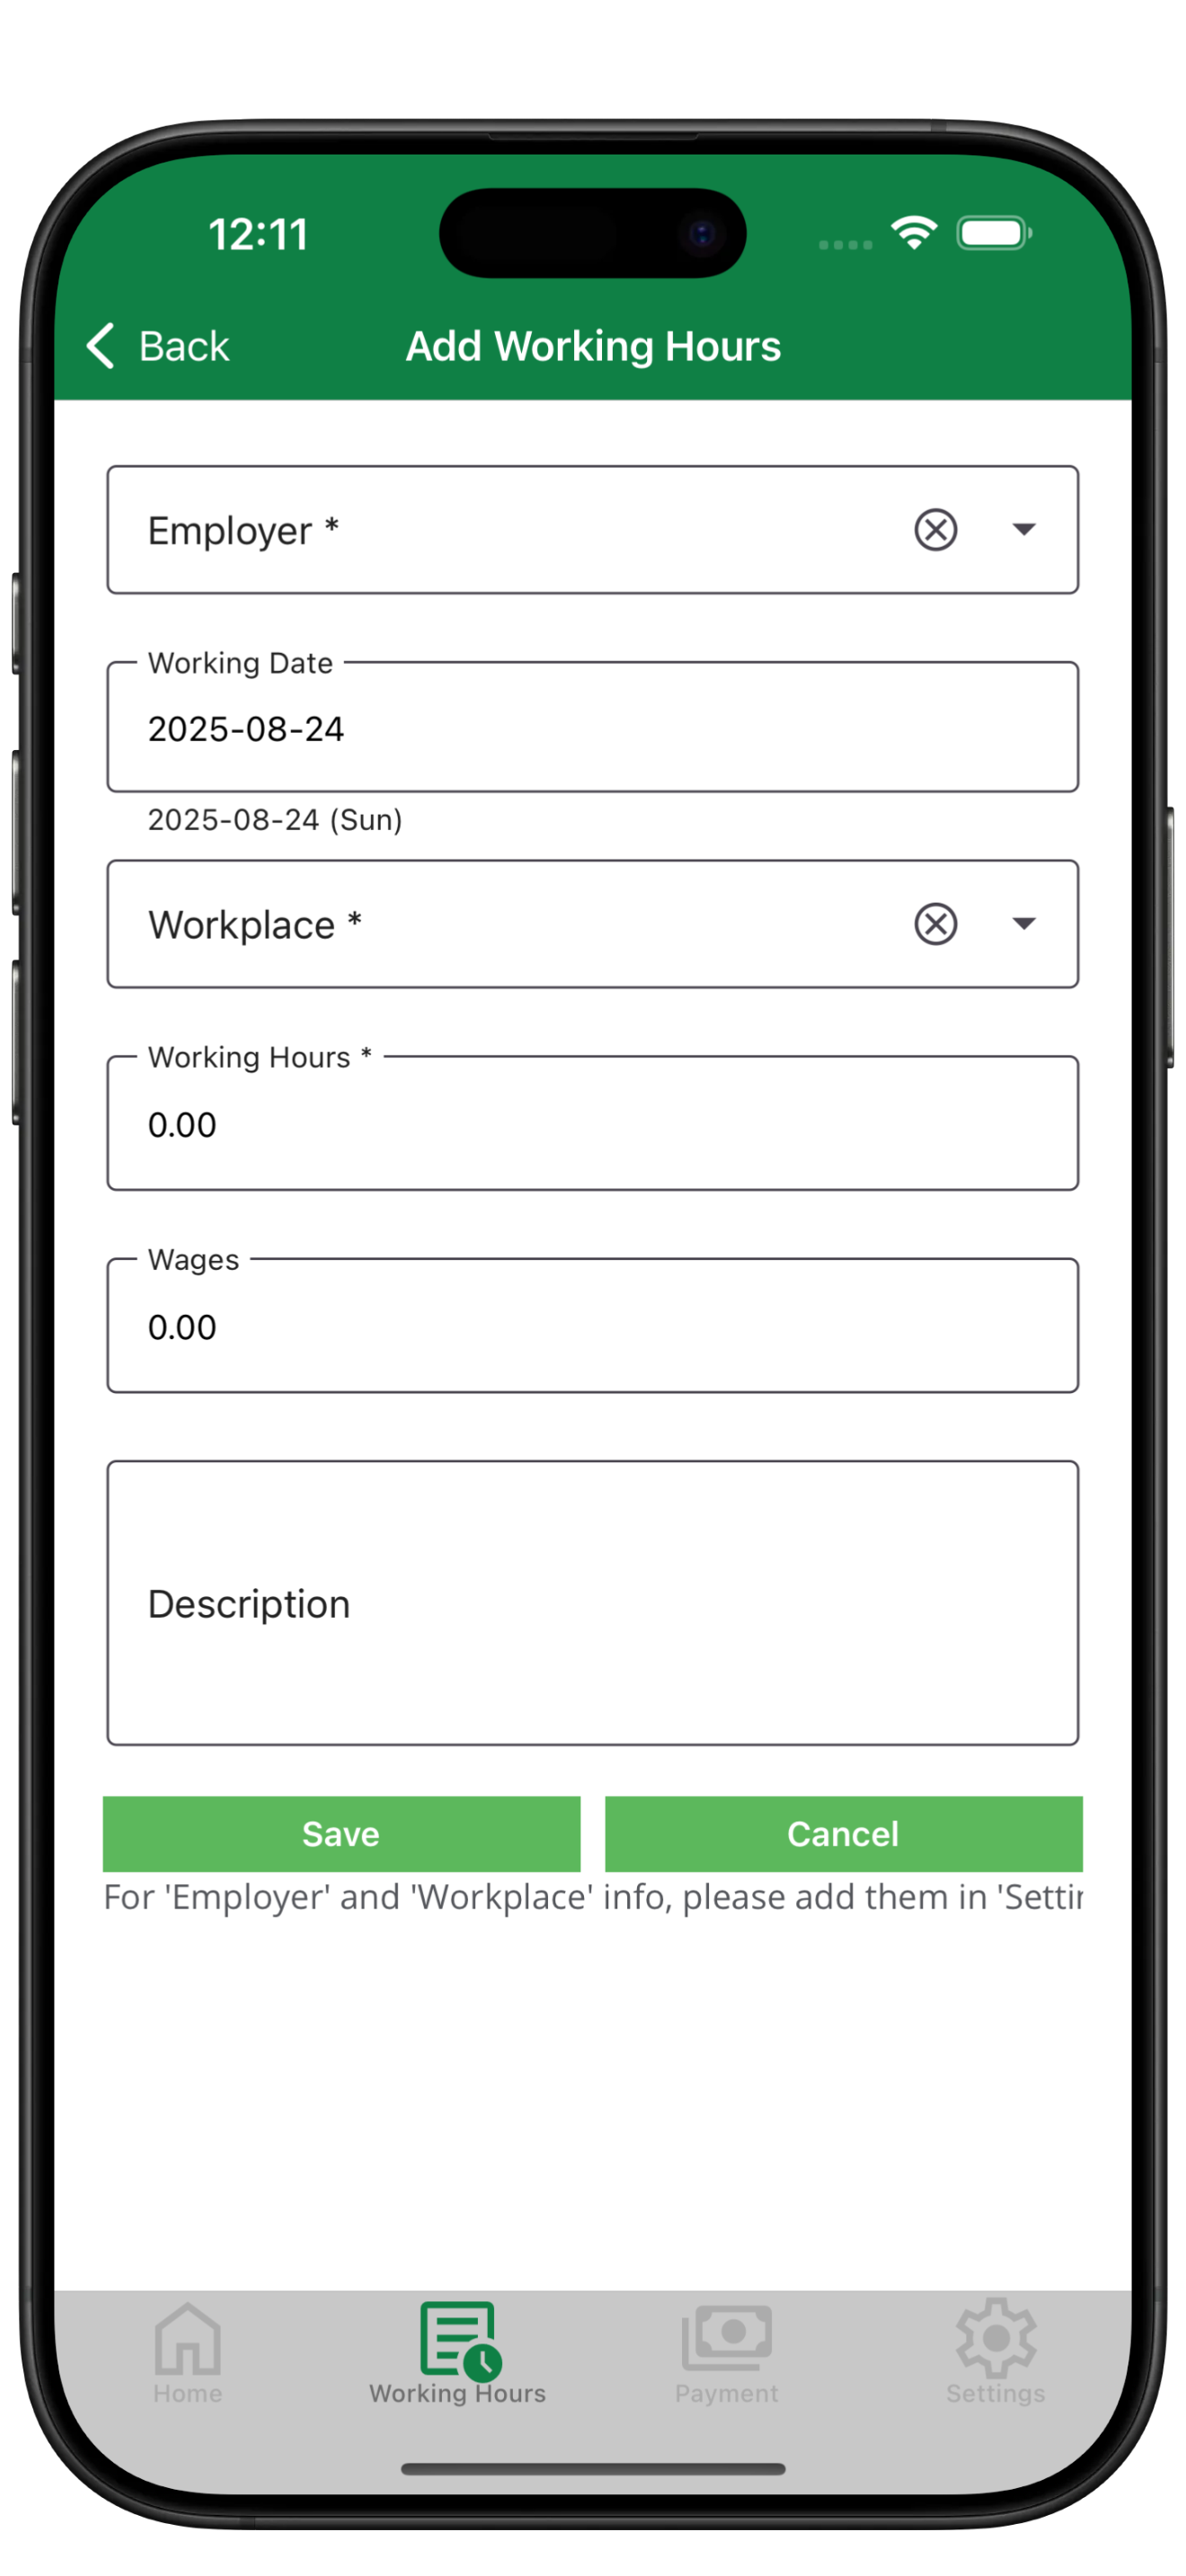
- Add Working Time: Tap the plus icon to open the working time entry screen for a new shift.
Main Content Highlights
- Annual Total: Large typography emphasises the cumulative wage for the current fiscal year (includes paid and unpaid amounts).
- Recent Payment Summary: Shows employer, company, payment date, and received amount. Displays “No data yet” if no payment exists.
Income History Card
- Headline: Describes the card purpose and reminds you of the fiscal year end date for tax planning.
- Chart Mode: Each bar represents a month; taller bars indicate higher income and display exact amounts.
- Calendar Mode: Month name at the top with left/right navigation, colour legend (yellow = unpaid, green = paid), and daily cells showing total hours such as “8h”.
Typical Scenarios
- Track Overall Finances: Open the home page to monitor yearly totals and the latest payment snapshot.
- Check Monthly Variations: Switch to Chart mode to compare income month by month.
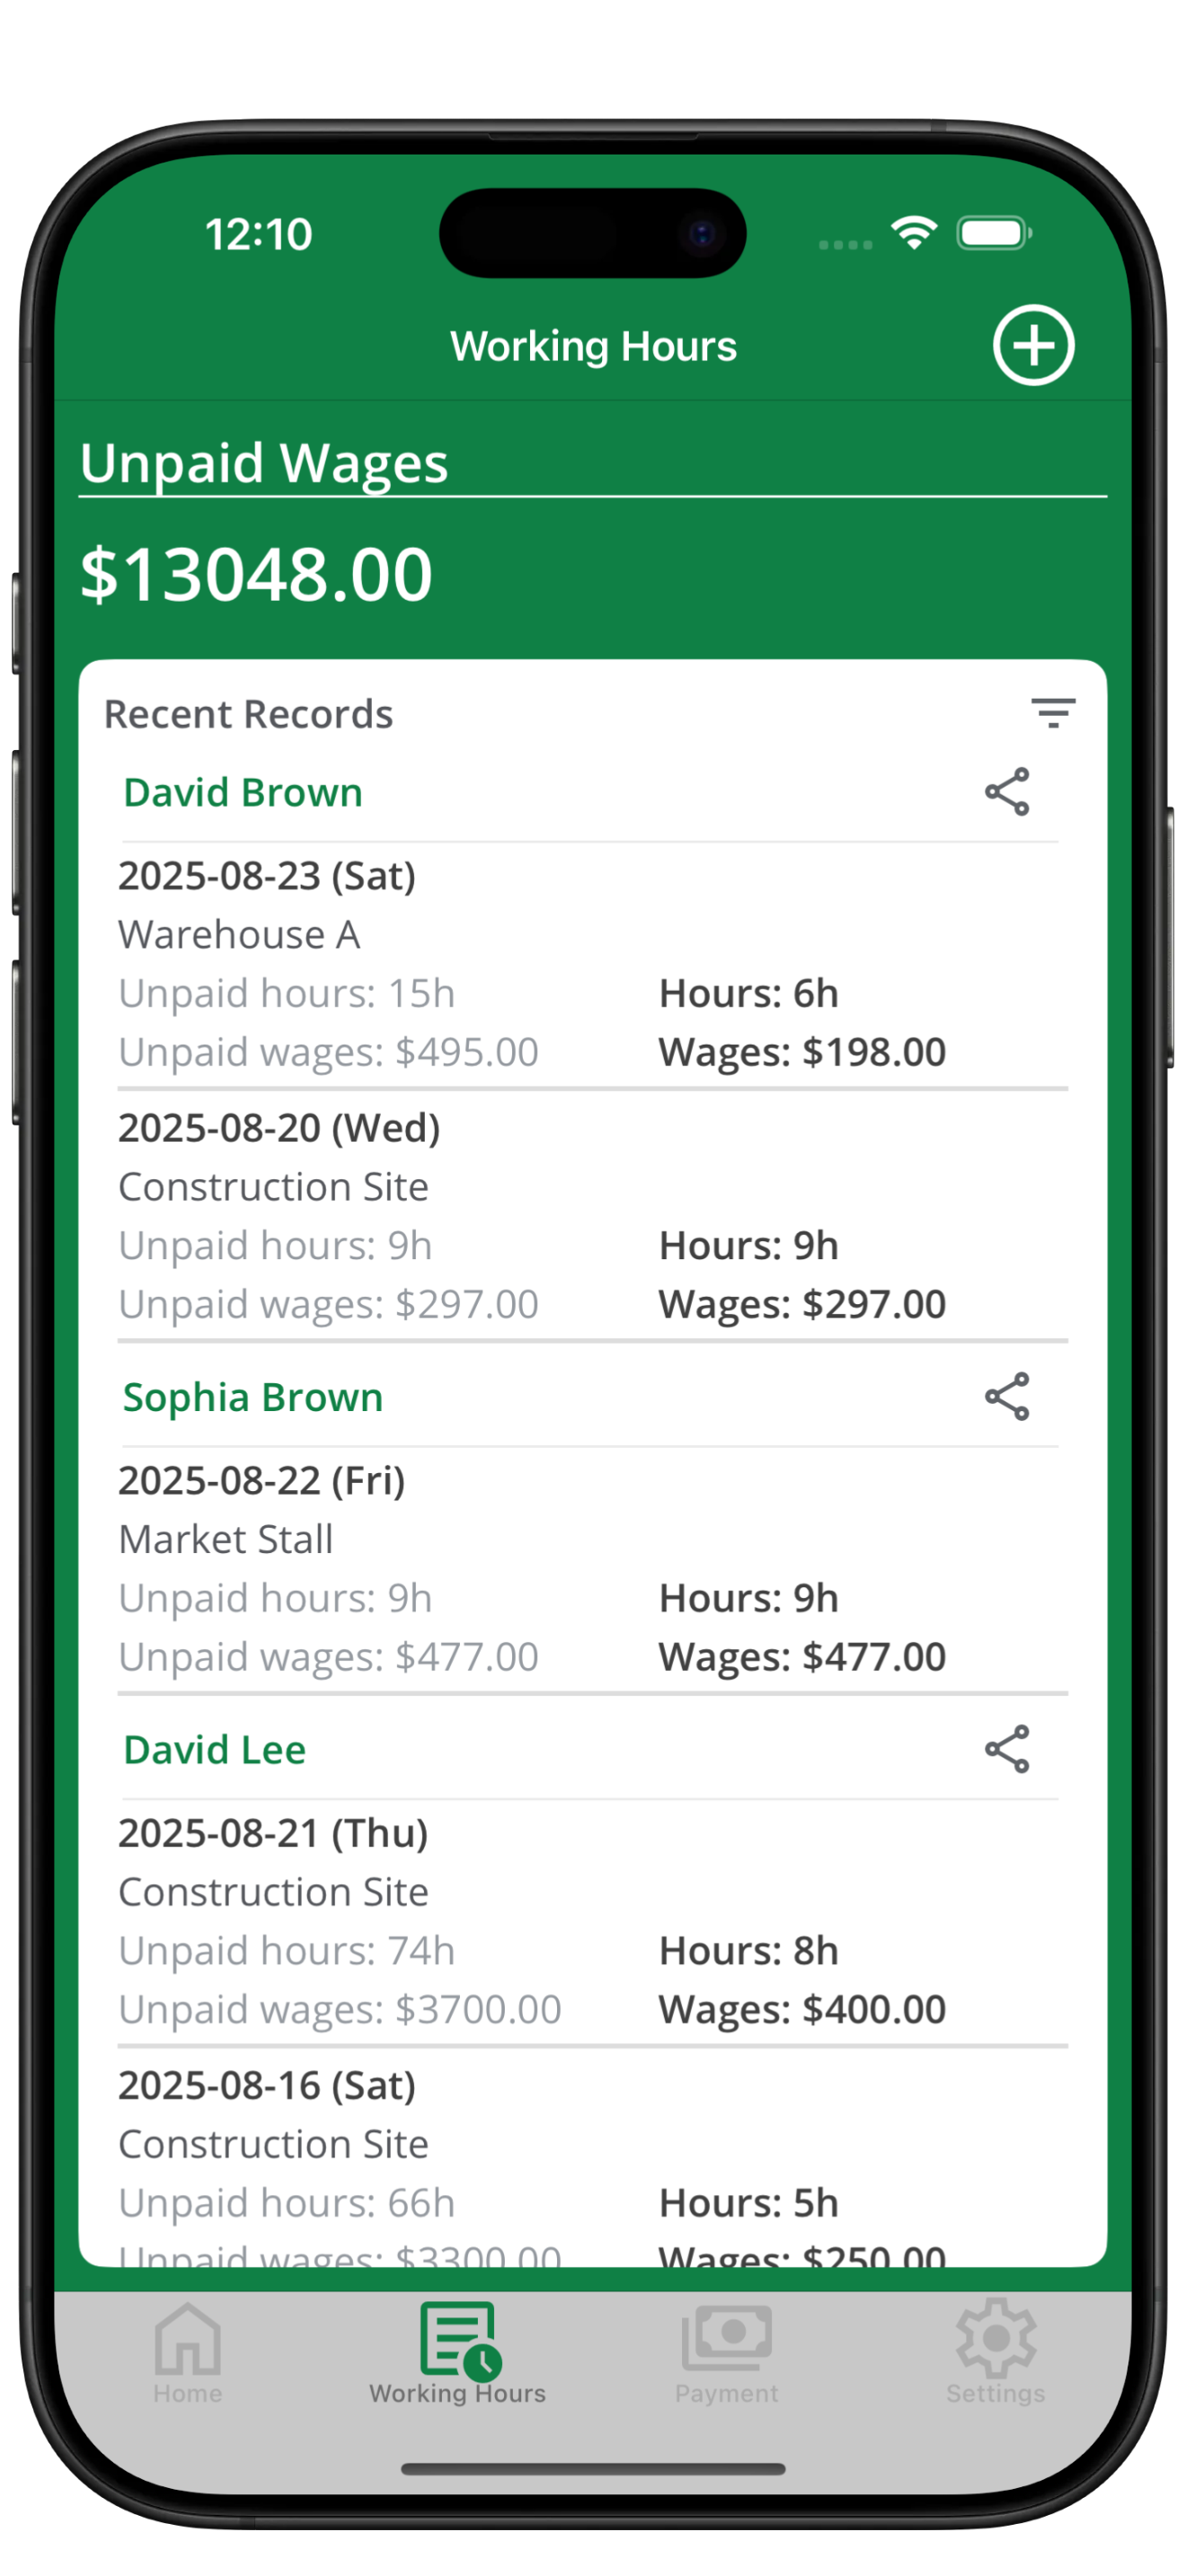
- Follow Daily Hours & Payments: Use Calendar mode to spot unpaid days by colour and hour labels.
- Capture New Shifts: Tap the plus icon whenever you recall a shift to keep statistics accurate.